eMDMDocumentation

Device Management
This section contains topics for managing devices across platforms. It covers topics such as grouping of devices, device tags, remote actions on devices, remote support management, managing the jobs and more.
Device Groups
This section contains the topics for creating and managing device groups for one or many devices. Admins can create logical groups to push job(s)/profiles with just a single click. Created groups and subgroups will be listed under Home section of the Device Groups.
Note: Any device in the device grid can be assigned to only one group.
The following table describes the settings available in Groups section:
|
Setting |
Description |
|
Add |
Add a new group |
|
Rename |
Rename the group |
|
Delete |
Delete the group |
|
Properties |
View group properties details such as total number of devices under a group, total number of subgroups under a group, total devices in the current group, total number of devices that are online, total number of devices that are online in the current group and ping all devices will convert all offline devices to online in a group. Note: Ping All Devices option is applicable only for GCM devices. |
|
Apply |
Push the job(s) to a selected group |
|
Job Queue |
View the jobs queued for a group based on the status: Pending, Success and Failed. |
Create a Group and Assign Devices
To create a new group and assign devices to a group, follow these steps:
- Navigate to eMDM Console.
- In the Device Groups section, select Home and click .
-
In the Add New Group prompt, enter the desired name and click Ok.
The newly created group will be listed under Home.
- There are two ways to assign devices to a group:
- Drag and drop the devices from Device Grid to a group or
- Select and right-click the device(s), click Move to Group option from the context menu.
Note:
i. The alternate option to create a new group is to right-click the Home in Groups and click Add.
ii. To create a sub-group, select and right-click a group and select Add and enter the desired name for the sub-group.
Rename a Group
To rename a group, follow these steps:
- Navigate to eMDM Console.
-
On the Device Groups section, select a group and click .
The existing group name will be displayed in the New Group Name field.
- On Rename existing group prompt, clear the existing group name and enter the desired name in New Group Name field and click OK.
Note: Alternate option to Rename a Group is to right-click on the group or subgroup and select Rename.
Delete a Group
To delete a group, follow these steps:
- Navigate to eMDM Console.
- On the Device Group section, select a group.
- Click to delete a group or subgroup.
- In the confirmation prompt, click OK.
Note:
i. Deleting a group will delete the devices in the group and its subgroups.
ii. Alternate option to Delete a Group is to right-click a group or subgroup and select Delete.
Apply Job to a Group
To assign job(s) to a group at a scheduled time, follow these steps:
- Navigate to eMDM Console.
- Select a group and click in Groups section.
- In the Apply Job/Profile To Group prompt, select the job(s) from the list.
- Select Configure Schedule Time to launch Schedule Job prompt.
-
Select an option for Push the job to device: - Immediately - Periodically - Schedule Days and Time - Schedule Date and Time
Note: Immediately option is selected by default.
- Click Apply.
Note: Alternate option to push a job to a group or subgroup, right-click a group or subgroup and select Apply.
View Job Status
When the job is applied to the device and the device is online then the job will be assigned to the device(s) immediately. If the device is offline, the job will get queued in the Job Queue section with the Status as Pending.
Click to view the status of the jobs. The status of the jobs are categorized as the following:
- Pending - Jobs that are paused or queued. Also, admin has an option to Re Apply the pending / error jobs.
- Success - Jobs that are assigned to the group successfully
- Failed - Jobs that are failed to assign on the device
- The Pending jobs can be reapplied once the device comes online.
To re-apply the job, follow these steps
-
Navigate to eMDM Console and select a group from the Device Group.
-
Click from the Device Toolbar.
-
In the Job Queue prompt under Pending section, select a job from the list and click Retry.
-
Select Configure Schedule Time to launch Schedule Job prompt.
Note:
i. Alternate option to view the job status is to right-click a group or subgroup and select Job Queue.
ii. The jobs under the status (Pending / Success / Failed) can be removed from the list using Remove Job.
Group Properties
To view total number of devices and subgroups in a group, follow these steps:
- Navigate to eMDM Console.
- In the Device Groups section, click and select a group.
- Click to launch Group Properties prompt.
-
Group Properties prompt will have the following options:
- Total Devices - Number of devices in a group
- Total Subgroups - Number of subgroups in a group
- Total Devices in Current Group - Number of devices in the current group
- Total Online - Number of devices that are online in the group
- Total Online in Current Group - Number of devices that are online in the current group
- Default Jobs - All the devices in a group will get the specified jobs applied.
Note:
i. In Default Jobs, the user has options to add or delete the jobs.
ii. The group color turns blue when default jobs are assigned to a group.
- Click OK.
Note: Alternate option to access Group Properties is to right-click a group or subgroup and select Properties.
Device Tags
eMDM allows admins to create multiple tags with a single device. Admins can easily categorize and view list of all the devices with a particular tag and push jobs to this list.
Following table describes the settings available in the Tags section:
|
Setting |
Description |
|
Add |
Add a new tag |
|
Rename |
Rename the tag |
|
Delete |
Delete the tag |
|
Apply |
Assign job(s) to the selected tag |
Assign a Device to a Tag
To assign a device to a tag, follow these steps:
- Navigate to eMDM Console.
- In the Console, select and right-click the desired device from Device List.
- Click Tag from the context menu.
- In the Tag List prompt, select from the existing tags or create a tag by entering a new name in Create Custom Tag field.
- Click Save.
View Devices under a Tag
To view a tag, follow these steps:
- Navigate to eMDM Console.
- On the Console, click Home >Tags.
- Under Tags section, select the desired tag to view the list of devices.
Rename a Tag
To rename a tag, follow these steps:
- Navigate to eMDM Console..
-
In the Device Tags section, select a tag and click .
The existing tag name will be displayed in the New Tag Name field.
- In the Rename existing Tag prompt, clear the existing tag name and enter the desired name in New Tag Name field and click OK.
Apply Job/Profile To Tag
To apply job(s)/ profile(s) to a tag at a scheduled time, follow these steps:
- On eMDM Web Console, select a group.
- Click in Tags section.
- On Apply Job/Profile To Tag prompt, select the job(s)/ profile(s) from the list and click
- Select Configure Schedule Time to launch Schedule Job prompt.
-
Select an option from the following for Push the job to device and click Apply.
-
Immediately
-
Periodically
-
Schedule Days and Time
-
Schedule Date and Time
Note: Immediately option is selected by default.
-
- Click Apply.
Note: Alternate option to push a job to a group or subgroup, right-click a group or subgroup and select Apply.
Remove a Tag
To remove a tag from the list, follow these steps:
- Navigate to eMDM Console, select a tag.
- Click in Tags section.
- Click Yes delete tag to confirm the deletion of tag.
Create Default Job(s) for a Tag
To create a default job and auto push it to devices with a specific tag, follow these steps:
- Navigate to eMDM Console, click Tags located in the Quick Action toolbar.
- Select the desired Tag and click Properties.
- On the Tag Properties prompt, click Add.
- On the Select Jobs to Add prompt, select the desired job and click OK.
Once done, all the devices with the tag name will get the specified job applied.
Blacklist Devices
Admin will have an option to blacklist the enrolled devices from the account. Such devices will not have any communication with the eMDM account and will be listed under Blacklisted section.
To blacklist a device, follow these steps:
- Navigate to eMDM Console.
- Select the device(s) from Device Grid.
- Click Blacklist from the Device Toolbar.
-
Click Yes.
The devices will be moved to the Blacklisted section below Groups.
Note:
i. The blacklisted device can be whitelisted and bring it back to the Device Grid by selecting Whitelist option.
ii. To whitelist the device, go to Blacklisted Device section, select the device and click Whitelist.
Filter Devices
eMDM allows admins to narrow down the search that matches a particular criteria using Filter option. The Filter section can create a customized view of deployed devices based on their status, device name, model name, IP address or settings. It will help the admin preserve time by quickly identifying sets of devices with a single click.
Note: When Filter option is selected eMDM automatically switches to Advanced search mode.
Create a Filter
To create a filter, follow these steps:
- Navigate to eMDM Console.
- Click Filter from the left panel.
-
Click to add a new filter.
Fill the necessary fields on the available columns to generate query.
- Click Save Filter.
- In the Device Filter prompt, enter a Filter Name and click OK.
Update the Filter
To update the filter, follow these steps:
- Navigate to eMDM Console.
- Click Filter from the left panel.
- Select a Filter from the list.
- Change the query (either add, remove or update column details such as device, model,status,etc).
- Click Update Filter > OK.
Delete a Filter
To delete a filter, follow these steps:
- Navigate to eMDM Console.
- Click Filter from the left panel.
- Select a Filter to delete and click .
- Confirm the request for deletion.
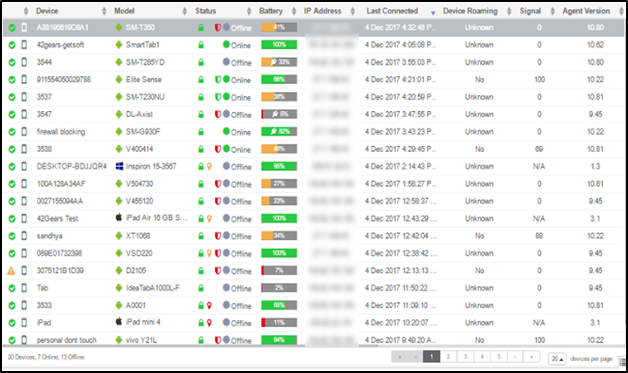
View Devices in Device Grid
Device Grid in eMDM Console displays all the enrolled devices with their details in the tabular format.
At the bottom of the Device Grid, the following options will be displayed:
- Total Number of devices in the device grid
- Number of online and offline devices
- Page navigation
- Select to display Devices per page (20/50/100/500/1000)
Right-Click Actions in Device Grid
More actions can be performed on selecting the device from Device Grid. Right-click the device, a context menu appears with the context items depending upon the platform selected.
Actions performed on right-clicking the device across platforms are listed in the table below. The description of the right-click actions is given below.
|
Right-Click Actions |
Platforms |
|||||||
|
Android |
iOS |
Windows |
Android Wear |
Linux |
macOS |
Android VR |
Windows CE/Mobile |
|
|
Refresh |
||||||||
|
Remote |
-- |
-- |
||||||
|
Reboot |
-- |
-- |
-- |
|||||
|
Move to Group |
||||||||
|
Tag |
||||||||
|
Delete |
||||||||
|
Push Application |
-- |
-- |
-- |
-- |
-- |
-- |
-- |
|
|
Push File |
-- |
-- |
-- |
-- |
-- |
-- |
||
|
SureLock |
-- |
-- |
-- |
-- |
-- |
-- |
||
|
SureFox |
-- |
-- |
-- |
-- |
-- |
-- |
-- |
|
|
SureVideo |
-- |
-- |
-- |
-- |
-- |
-- |
-- |
|
|
Configure eDS Agent |
-- |
-- |
-- |
-- |
-- |
-- |
-- |
|
Description of Right-Click Actions
Description of actions that can be performed on right-clicking the device are given in the table below:
|
Settings |
Description |
|
Refresh |
Refresh the device |
|
Remote |
Initiate a remote connection with a device. Note: This feature works only when eMDM is running in Internet Explorer (9.0 and above versions) and MozillaFirefox (26.0 and above versions) for Windows CE/Mobile devices. |
|
Reboot |
Restart the device |
|
Move to Group |
Move the device to a Group |
|
Tag |
Move the device to a Tag |
|
Delete |
Delete device(s) from the Device List |
|
Push Application |
Upload an application on the device(s) |
|
Push File |
Upload a file on the device(s) |
|
SureLock |
Deactivate SureLock license Install SureLock Note: Android VR devices can be locked down into kiosk mode on right-clicking SureLock > Enable Kiosk. |
|
SureVideo |
Install and manage SureVideo |
|
Configure eDS Agent |
Configure eDS Agent settings on the device |
Utility Panel
This section allows users to access dashboard, emails, manage jobs, view/generate reports, create profiles and manage files using File Store, create enterprise App Store, get information by typing or voicing the requirement using Deep Thought.
View Device Details
Select a device from the Device Grid that will display the device details in the Device Information Panel located in the right of the eMDM Console. It displays more information on Device, Network, Battery and Memory status of the selected device.
- Device - Device Model, Operating System, Device Name, Agent Version, Last Device Name, Notes, Location Tracking, Custom Column, Geo Fence, Time Fence, Network Fence
- Network - MAC Address, IP Address, Connection, Wi-Fi Signal
- Battery - Main Battery status
- Memory - Program Memory, Storage Memory

Note: The settings with Edit option can be turned ON/OFF from Device Informational Panel itself for the selected device.
View System Logs
eMDM keeps a log that will record a list of actions happening in an account. These logs are updated in chronological order and even displays log information of other users who are logged into the same account.
Note: The log information can be exported as a .txt file using Export option located at the right corner of the System Logs section.
Device Dashboard
eMDM Console has an HTML5 based dashboard. Admins can sort, filter and organize to get customized panels with summarized views of device parameters. It is an easy-to-comprehend, one-page graphical representation view of device details, their status, alerts, notifications and more.
To view eMDM Dashboard, click Dashboard from Utility Panel. Select a Group or Tag and parameters from the left panel to display the corresponding charts on the dashboard.

Note:
i. In some charts, admins can select, view and export the device details.
For example: If admins want to view the pending jobs of all platforms, click Pending section of the Jobs chart and view the device and job details that are pending to apply.
ii. To display values on the charts, turn ON Show values on charts located at the right of the Console.
Actions on Devices (Device Toolbar)
Select device(s) or a group to perform the following remote actions.

Following actions can be remotely performed on Device Toolbar is given in the table below:
|
Settings |
Description |
|
Delete |
Delete the selected device(s) from the list. |
|
Apply |
Push a job to the selected device(s). |
|
Queue |
View Job(s) that are deployed, pending / error jobs in the queue. |
|
Locate |
Track the device(s) location using GPS. See Location Tracking of Device(s). |
|
Blacklist |
Blacklist the selected device(s) from the list. |
|
Logs |
View log information of a selected device. |
|
Search |
Search device(s) on the basis of the matching pattern.
|
|
Export |
Export all device details from Device Grid in .csv format. |
|
Refresh |
Refreshes the device in the Device Grid. |
|
Columns |
View to customize the display of device details. Admin can also add custom column for the custom hardware attached to the enrolled devices. See Configure Custom Column. |
Configure Custom Column
eMDM offers an option to collect details from custom hardware attached to the enrolled devices and list them in the custom columns. For example, If an Android device has custom hardware, a barcode scanner, eMDM eDS Agent will not be able to capture any details related to the scanner. To report the custom values from these custom hardware to the eMDM server, admin can write a small Android application that can report these values to eMDM eDS Agent which get updated in the eMDM server and will be displayed in the custom column of eMDM Console.
To configure a custom column, follow these steps:
- Navigate to eMDM Home and click Column View.
- Select Custom Column and click the Settings.
- In the Custom Column prompt, click Add.
- In the ADD Custom Column prompt, enter the name of the column as the value added in custom_field_name and click OK.
- Select the newly added custom column to add it to the column section.
Once done admin has to create an Android Application to capture the custom data and send it to eMDM eDS Agent. The Java code to send the information to eMDM eDS Agent is:
Intent intent = new Intent();
intent.setAction("com.nix.COMMUNICATOR");
intent.putExtra("command", "setCustomField");
intent.putExtra("custom_field_name", "Number of Scans");
intent.putExtra("custom_info_key", "100");
sendBroadcast(intent);
Here, Number of Scans is the name of the custom column defined in eMDM Console. This name should be exactly same as the one defined in step no. 4. 100 is the value of the custom column that will be displayed in the eMDM Console.
On firing this Intent eMDM eDS Agent will report the Custom Column value to the server and the column section in eMDM Console will start displaying given value.
Location Tracking of Device(s)
Location tracking feature in eMDM helps the admin in providing real-time location information as well historical breadcrumb trail of locations for mobile devices. The tracking information can be used to know the current location of a device as well as use the locations where the device has been through before it reached the destination.
To enable and track the device(s), follow these steps:
Note: Admin can track the locations for online device(s) only.
- Navigate to eMDM Console and click on the device(s) to initiate location tracking.
-
Click Locate.
Location Tracking window will appear.
Note:
If Location Tracking option is not enabled, there are two ways to enable it:
a. From Device Information Panel
In the Device Information panel on the right of the Console, click Edit of Location Tracking
In the Location Tracking prompt, turn ON Location Tracking and enter the value in numeric for Tracking Periodicity and click OK.
b. From Location Tracking window
In Location Tracking windows, turn ON the appropriate device for tracking from the left panel.
In the Location Tracking prompt, turn ON Location Tracking and enter the value in numeric for Tracking Periodicity and click OK.
The left panel displays the list of devices being tracked and main screen shows the google map locating the device address.
Location Tracking window has two options:
Real Time: The Real Time mode displays the current location of the device. Click on the location to display the details such as Date, Time at which location was last received, Lat,Lgn and Address on the Google maps.
Real Time Mode has following option:
-
Refresh : The Real Time map auto refreshes itself every 10 seconds and also admin can refresh manually using the Refresh button at any point of time.
-
History: The History mode displays the historical tracking of the device for 24 hours. Click on the location to display the details such as Date, Time at which location was last received, Lat,Lgn and Address on the Google maps. History Mode has the following options:
- Clear History – Clears the tracking history details of the device.
- Modify – Edit the period of tracking such as date and time for which the device location history has to be displayed and Location Accuracy
- Export – Exports the location tracking history in CSV format.
Manage Two-Way Messaging
eMDM offers a two-way messaging service for admins to broadcast instructions or notifications to employees directly from the web console. The two-way messaging is done using the Message and Mailbox options available on the web console and device side respectively.
eMDM offers Plain Text and Rich Text formats for sending messages. While Plain Text is for creating simpler texts without any formatting, the Rich Text option allows admin to change the color of the text, underline the text, insert order list, as well as create bold and italicize text. At the same time, on the end user side, there is an Inbox option to compose new messages or reply to messages from their devices to console.
Send Message to a Specific Device
To send a message to a specific device, follow these steps:
-
In the eMDM Console, select a device from the device grid and click Message from Dynamic Jobs section.
Note: Message option is not available for Linux, Android VR and macOS devices.
- In the Send Message prompt, add Subject.
-
Choose Plain Text Message or Rich Text message from the option. Add text in the Message text box.
-
Plain Text Message allows users to send a simple text message to the end user. In case the user selects Rich Text message there will be an option to format the text using the following options:
-
Bold, Italic, Underline, Bullet Points, Numbering, Link, Font Size, Header 1, Header 2 and Text Color.
-
- Select Get Read Notification to receive confirmation that the text has been read by the end user.
- Select Force Read Message to ensure that the message is read by the end user.
-
Enable Buzz to pop up the message with a buzz on the end user device. Add the number of seconds for the message to buzz on the device in the Seconds box.
Note: Works only on Android devices and Android eDS Agent Version 13.29 onwards.
-
Select Close Message Popup to close the message popup by itself. Add the number of seconds in the Seconds box to close the message automatically after the specified time.
Note: Works only on Android devices and Android eDS Agent Version 13.29 onwards.
-
Choose Rich Text message to format the text.
- Add text in the text box and format the text using options available – Bold, Italic, Underline, Bullet Points, Numbering, Link, Font Size, Header 1, Header 2 and Text Color.
Note: Supported only on Android devices.
- Click Send.
To send messages to multiple devices, it can be done through the eMDM Jobs.
Send Messages to Multiple Devices
To send messages to multiple devices at once:
- Navigate to eMDM Console > Jobs > New Job > Select OS.
- Select Text Message and follow same steps under Send Message to a Specific Device.
- Save the Job. Select multiple devices and click Apply.
On the end user side, there is an option to compose new messages or reply to messages from their devices to console using eMDM eDS Agent.
Send Messages to Admin from device
To send a message to the admin, follow these steps:
- In the eMDM eDS Agent home screen, tap Mailbox > Compose icon on the right.
- In the Compose Message prompt, enter Subject and Message.
- Tap Send, message can be read in Inbox section on eMDM Console.
Manage Jobs
Jobs refers to the tasks which admin can create and remotely deploy on the enrolled device(s) or group(s). There are two types of Jobs that can be deployed to the devices:
- Dynamic Jobs - Jobs that are deployed remotely on a specific device
- Static Jobs - Jobs that are deployed remotely on multiple device(s) or group(s)
Remote Deployment of Dynamic Jobs Using Quick Action Toolbar
This section provides easy to use quick action buttons to perform an action or assign job on a specific device. These jobs are called Dynamic Jobs. Dynamic Jobs can be deployed remotely on a specific device only. Select a device from Device Grid, the dynamic jobs associated with the devices’ platform will be displayed on the right of the eMDM Console. Select the required dynamic job to push it to the device and configure the details applicable to that job.
Note: Certain Dynamic Jobs cannot be selected from the Quick Action Toolbar when the device is offline.
For example: Message dynamic job cannot be pushed on a device when the device is offline.

Dynamic jobs supported across platforms are listed below. The description of the dynamic jobs is given below.
|
Dynamic Jobs |
Platform |
||||||||
|
Android |
iOS |
Windows |
Android Wear |
Linux |
Android VR |
Windows CE |
Windows Mobile |
macOS |
|
|
Refresh |
|||||||||
|
Remote |
-- |
-- |
|||||||
|
Apps |
-- |
-- |
-- |
||||||
|
SureLock |
-- |
-- |
-- |
-- |
-- |
||||
|
SureFox |
-- |
-- |
-- |
-- |
-- |
-- |
-- |
-- |
|
|
Call Logs |
-- |
-- |
-- |
-- |
-- |
-- |
-- |
||
|
SMS Logs |
-- |
-- |
-- |
-- |
-- |
-- |
-- |
||
|
Reboot |
-- |
-- |
|||||||
|
Reset |
-- |
-- |
-- |
-- |
-- |
-- |
-- |
||
|
Lock |
-- |
-- |
-- |
||||||
|
Message |
-- |
-- |
-- |
||||||
|
SureVideo |
-- |
-- |
-- |
-- |
-- |
-- |
-- |
-- |
|
|
Wipe |
-- |
-- |
-- |
-- |
|||||
|
Data Usage |
-- |
-- |
-- |
-- |
-- |
||||
|
Remote Buzz |
-- |
-- |
-- |
-- |
-- |
-- |
-- |
||
|
Shut Down |
-- |
-- |
-- |
-- |
-- |
-- |
-- |
||
|
OS Updates |
-- |
-- |
-- |
-- |
-- |
-- |
|||
|
Recovery Key |
-- |
-- |
-- |
-- |
-- |
-- |
-- |
-- |
|
Description of Dynamic Jobs
Detailed Description of the dynamic jobs that can be pushed on a specific device remotely from the eMDM Console:
|
Settings |
Description |
|
Refresh |
Refresh the devices in Device Grid |
|
Remote |
Remotely connect to an enrolled device. To know more, see Remote Support Management. |
|
Apps |
Displays all native and installed applications on the device |
|
SureLock |
Push and apply settings of SureLock Application to a device |
|
SureFox |
Push and apply settings of SureFox Application to a device |
|
Call Logs |
View and import call log details of a device |
|
SMS Logs |
View and import SMS log details of a device |
|
Reboot |
Reboot the device |
|
Reset |
Reset device password remotely |
|
Lock |
Initiate device lock remotely |
|
Message |
Send an instant message to enrolled devices |
|
SureVideo |
Push and apply settings of SureVideo Application to a device |
|
Wipe |
Wipe the data from the device remotely |
|
Data Usage |
Track data usage information remotely based on the connectivity preference (Mobile Data / Wi-Fi Data) for a specific period |
|
Remote Buzz |
Locate the device by creating a buzzing sound when misplaced or lost |
Remote Deployment of Static Jobs
Jobs refers to the tasks which admin can create and remotely deploy on the enrolled device(s) or group(s). Such jobs are called Static jobs. All the created jobs are saved under Jobs List and jobs can be assigned to the devices immediately or schedule it at a specific date and time.
Note:
i. When the job is applied to a device and if the device is online then the job will be pushed to the device(s) immediately. If the device is offline, the job will be queued in the Job Queue section with status showing Pending.
ii. Check Logs window to see the progress of applied job.
The static jobs available across platforms are given below:
Jobs for Android
Navigate to eMDM Console > Jobs > New Job > Android. The jobs available for Android devices will be listed on the screen. These jobs are:
Install Application (Android)
Install Application job will remotely install or upgrade an application on the enrolled devices.
To create Install Application job and deploy it to the enrolled device(s) or group(s) remotely, follow these steps:
- Navigate to eMDM Console > Jobs > New Job > Android > Install Application.
- In the Configure Job screen, enter a Job Name and click Add.
-
In the Install Job prompt, enter the following details:
Settings
Description
File Path/URL
Browse and select the apk file from the system or type file URL.
Device Path
Enter the server path for the file to save.
Install After Copy
This option will be selected by default. It will copy and then install the application on the device.
Use Authentication
If the user has specified the selected file or URL in File Path/URL field as password protected, then the file or URL can be accessed only by giving login credentials.
Note: This feature works only when the apk downloaded device supports' authentication.
-
Click OK.
The newly created job will be listed in the Jobs List section.
- Go back to Home tab and select the Android device(s) or group(s).
- Click Apply to launch Apply Job/Profile To Device prompt.
- In the Apply Job/Profile To Device prompt, select the job and click Apply.
File Transfer (Android)
File Transfer job will remotely transfer the files to the enrolled device(s) or group(s).
To create File transfer job and deploy it to the device(s) or group(s) remotely, follow these steps:
- Navigate to eMDM Console > Jobs > New Job > Android > File Transfer.
- In the Configure Job screen, enter a Job Name and click Add.
-
Configure File Transfer settings and click OK.
Setting
Description
File Path/URL
Browse and select the file from the system or specify the link where the file is hosted.
Device Path
Enter the location for the file to save.
Use Authentication
If the user has specified the selected file or URL in File Path/URL field as password protected, then the file or URL can be accessed only by giving login credentials.
Note: This feature works only when the apk downloaded device supports' authentication.
The newly created job will be listed in the Jobs List section.
- Go back to Home tab and select the Android device(s) or group(s).
- Click Apply to launch the Apply Job/Profile To Device prompt.
- In the Apply Job/Profile To Device prompt, select the job and click Apply.
Text Message (Android)
Text Message job helps the admin to remotely send text messages or broadcast messages on an enrolled device(s).
To create a job to compose a message and deploy it to the enrolled device(s) or group(s) remotely, follow these steps:
- Navigate to eMDM Console > Jobs > New Job > Android > Text Message.
-
Configure Text Message settings and click OK.
Settings
Description
Job Name
Enter a name for the Job
Subject
Enter the subject for the message
Message
Enter the message with following message type enabled:
Plain Text Message – Simple text without formatting.
Rich Text Message – Allows formatting of the text such as Font color, Font Size and more.
Note: Rich text Message feature works on Android eDS Agent version 13.47 onwards.
Get Read Notification
Select this option to get the confirmation on message read by the end user.
Force Read Message
Select this option to force the device users to read the message. A message prompt will appear on the device user's screen.
The newly created job will be listed in the Jobs List section.
- Go back to Home tab and select the Android device(s) or group(s).
- Click Apply to launch the Apply Job/Profile To Device prompt.
- In the Apply Job/Profile To Device prompt, select the job(s) and click Apply.
Remote Data Wipe (Android)
Remote Data Wipe job remotely wipes all the data on the enrolled device.
To create a job to wipe data and deploy it to the enrolled device(s) or group(s) remotely, follow these steps:
- Navigate to eMDM Console > Jobs > New Job > Android > Remote Data Wipe.
- In the Remote Data Wipe prompt, enter the Job Name and turn ON Wipe All Data.
-
Select Wipe Data If Device Is Offline to wipe the data when the device goes offline and click OK.
The newly created job will be listed in the Jobs List section.
- Go back to Home tab and select the Android device(s) or group(s).
- Click Apply to launch Apply Job/Profile To Device prompt.
- In the Apply Job/Profile To Device prompt, select the job and click Apply.
Run Script (Android)
Run Script job allows admins to remotely run customized scripts on the enrolled devices.
To create a job to run customized scripts and deploy it to the enrolled device(s) or group(s) remotely, follow these steps:
- Navigate to eMDM Console > Jobs > New Job > Android > Run Script.
-
In the Run Script prompt, enter a Job Name, Script and click Save.
or
To add a pre-defined script in the Script box, follow these steps:
- Select a feature under All/Knox/EA/Shell.
- In Run Script prompt, insert the script in the blank space (if required) and click Validate.
- A confirmation on successful validation will be displayed.
- Click Insert.
The newly created job will be listed in the Jobs List section.
- Go back to Home tab and select the Android device(s) or group(s).
- Click Apply to launch Apply Job/Profile To Device prompt.
- In the Apply Job/Profile To Device prompt, select the job and click Apply.
Lock Device (Android)
Lock Device job remotely locks the device or change the existing device password. This feature is helpful when an enrolled device is lost or stolen.
To create a job to lock the device and deploy it to the enrolled device(s) or group(s) remotely, follow these steps:
- Navigate to eMDM Console > Jobs > New Job > Android > Lock Device.
-
In the Lock Job prompt, enter a Job Name and select the following options and click OK.
- Lock the device
- Change password
Note: Lock Device option will work only when a password is already configured and enabled on the device.
The newly created job will get listed in the Jobs List section.
- Go back to Home tab and select the Android device(s) or group(s).
- Click Apply to launch the Apply Job/Profile To Device prompt.
- In the Apply Job/Profile To Device prompt, select the job and click Apply.
eDS Agent Settings (Android)
eDS Agent Settings job remotely configures or updates eMDM eDS Agent settings on the enrolled devices.
To create a job to configure eDS Agent Settings and deploy it to the enrolled device(s) or group(s) remotely, follow these steps:
- Navigate to eMDM Console > Jobs > New Job > Android > eDS Agent Settings.
-
In the eDS Agent Settings prompt, enter a Job Name and select the applicable options and click OK.
Settings
Description
Enable time synchronization with server
Select the Periodicity from drop-down menu to synchronize with the server in specified time.
Enable device info update
Select the Periodicity from drop-down menu to update device info in specified time.
Enable eDS Agent Password
Enter the password to configure eDS Agent settings.
Enable Schedule Reboot
Schedule for device reboot at a specified time on selected Days.
Enable Schedule Shutdown
Schedule for device shutdown at a specified time on selected Days.
Connection Type
Select the Connection Type (Any/ Wi-Fi Only/ Mobile Data) from the drop-down menu to connect to the internet.
The newly created job will be listed in the Jobs List section.
- Go back to Home tab and select the Android device(s) or group(s).
- Click Apply to launch the Apply Job/Profile To Device prompt.
- In the Apply Job/Profile To Device prompt, select the job and click Apply.
Composite Job (Android)
eMDM allows the user to deploy a combination of job types by a special job called Composite Job. The composite job can have a combination of multiple jobs such as installation, send messages, eDS Agent settings and more. Composite Job helps the admin to apply multiple jobs on an enrolled device(s) with just a single click.
To create a composite job and push it to the enrolled device(s) or group(s) remotely, follow these steps:
- Navigate to eMDM Console > Jobs > New Job > Android > Composite Job.
-
In the Configure Job screen, enter a Job Name and click Add.
Note: Add Delay option will delay for the specified time on executing the job.
-
In the Select Job(s) To Add prompt, select the job(s).
Note: Use Ctrl key to select multiple jobs.
-
Go back to Configure Job screen.
Note: Use the controls, Move Up and Move Down to prioritize the desired jobs in a sequence.
-
Click OK.
The newly created job will be listed in the Jobs List section.
- Go back to Home tab and select the Android device(s) or group(s).
- Click Apply to launch the Apply Job/Profile To Device prompt.
- In the Apply Job/Profile To Device prompt, select the job and click Apply.
Notification Policy (Android)
eMDM allows admin to create notification policies for enrolled devices. Once this job is pushed to the enrolled device, automatic notifications will be sent when the device goes beyond the set threshold.
To configure Notification Policy on the enrolled device(s) or group(s) remotely, follow these steps:
- Navigate to eMDM Console > Jobs > New Job > Android > Notification Policy.
-
Configure Notification Policy settings and click OK.
Settings
Description
Job Name
Enter a name for the Job.
Disable Notification Policy
Select this option to disable all the notification settings for a specific Job.
Enable Battery Policy
Select this option to set the value (in %) for battery threshold. This option notifies the users (Device/Admin/E-mail address) when an enrolled device battery power falls below the set threshold.
Enable Connection Policy
Select this option to set the time (in min). This option notifies the users (Device/Admin/Email address) when an enrolled device is offline in the Console beyond the specified period of time.
Enable Data Usage Policy
Select this option to set the data usage (in KB/MB/GB). This option notifies the users (Device/Admin/E-mail address) when an enrolled device data consumption exceeds the set threshold.
Notify when device comes online
This option notifies the users (device/admin/e-mail address) when an enrolled device comes online after being offline.
Notify when SIM is changed
This option notifies the users (device/admin/e-mail address) when an enrolled device sim card is changed.
Notify when device is rooted or eDS Agent has been granted with root permission
Sends notification when the device has granted root access or when the eDS Agent has got advance management permissions after rooting.
Send Alert to
Admin can configure the notification alert to the following options:
eMDM Web Console – Admin of the account
Device – Device user
E-Mail Notification – Configured Email address
SMS Notification - Configured Mobile Number
The newly created job will be listed in the Jobs List section.
- Go back to Home tab and select the Android device(s) or group(s).
- Click Apply to launch the Apply Job/Profile To Device prompt.
- In the Apply JobProfile To Device prompt, select the job and click Apply.
SureLock Settings (Android)
Admin can configure SureLock Settings remotely on the enrolled devices.
To create SureLock Settings job and deploy it to the enrolled device(s) or group(s) remotely, follow these steps:
- Navigate to eMDM Console > Jobs > New Job > Android > SureLock Settings.
-
In the SureLock Settings prompt, select the desired option from the following and configure the settings and then click Save.
-
a. Allowed Applications
-
b. SureLock Settings
-
c. Samsung Knox Settings
-
d. Allowed Widgets
-
e. Manage Shortcuts
-
f. Phone Settings
-
g. Multi-User Profile Settings
-
h. Import/Export Settings
-
i. About SureLock
-
-
Enter a Job Name, Password and click OK.
The newly created job will be listed in the Jobs List section.
- Go back to Home tab and select the Android device(s) or group(s).
- Click Apply to launch the Apply Job/Profile To Device prompt.
-
In the Apply Job/Profile To Device prompt, select the job and click Apply.
Note: Admin has the following options to select from:
i. Download the surelock.settings file using Save As File.
ii. To edit the SureLock settings in XML form, click Edit XML.
iii. To install and activate SureLock on a device remotely, click Advanced Option and enter the Activation Code.
SureLock Settings job can also be deployed to an enrolled device using Quick Action Toolbar. See Remote Deployment of Dynamic Jobs Using Quick Action Toolbar.
SureFox Settings (Android)
Admin can configure SureFox Settings remotely on enrolled devices.
To create SureFox Settings job and deploy it to the enrolled device(s) or group(s) remotely, follow these steps:
- Navigate to eMDM Console > Jobs > New Job > Android > SureFox Settings.
-
In the SureFox Settings prompt, select the desired option from the following and configure the settings and then click Save.
-
a. Allowed Website
-
b. Blocked Website
-
c. Manage Categories
-
d. Browser Preferences
-
e. SureFox Pro Settings
-
f. Samsung Knox Settings
-
g. Display Settings
-
h. Import/Export Settings
-
i. About SureFox
-
-
Enter a Job Name, Password and click OK.
The newly created job will be listed in the Jobs List section.
- Go back to Home tab and select the device(s) or group(s).
- Click Apply to launch the Apply Job/Profile To Device prompt.
-
In the Apply Job/Profile To Device prompt, select the job and click Apply.
Note: Admin has the following options to select from:
i. Download the surelock.settings file using Save As File.
ii. To edit the SureFox settings in XML form, click Edit XML.
iii. To install and activate SureFox on a device remotely, click Advanced Option and enter the Activation Code.
SureFox Settings job can also be deployed to an enrolled device using Quick Action Toolbar. See Remote Deployment of Dynamic Jobs Using Quick Action Toolbar.
SureVideo Settings (Android)
Admin can configure SureVideo Settings remotely on the enrolled devices.
To create SureVideo Settings job and deploy it to the enrolled device(s) or group(s) remotely, follow these steps:
- Navigate to eMDM Console > Jobs > New Job > Android > SureVideo Settings.
-
In the SureVideo Settings prompt, select the desired option from the following and configure the settings and then click Save.
-
a. SureVideo Settings
-
b. SureVideo Pro Settings
-
c. Import/Export Settings
-
d. About SureVideo
-
-
Enter a Job Name, Password and click Save.
The newly created job will be listed in the Jobs List section.
- Go back to Home tab and select the Android device(s) or group(s).
- Click Apply to launch the Apply Job/Profile To Device prompt.
- In the Apply Job/Profile To Device prompt, select the job and click Apply.
SureVideo Settings job can also be deployed to an enrolled device using Quick Action Toolbar. See Remote Deployment of Dynamic Jobs Using Quick Action Toolbar.
Location Tracking (Android)
Location tracking job helps the admin to remotely enable location tracking on the enrolled device and set tracking periodicity.
To create a Location Tracking job and deploy it to the enrolled device(s) or group(s) remotely, follow these steps:
- Navigate to eMDM Console > Jobs > New Job > Android > Location Tracking.
- In the Location Tracking prompt, enter a Job Name and select Enable Location Tracking.
-
Choose a value from the spin box (in minutes) in Tracking Periodicity and click OK.
The newly created job will be listed in the Jobs List section.
- Go back to Home tab and select the Android device(s) or group(s).
- Click Apply to launch the Apply Job/Profile To Device prompt.
- In the Apply Job/Profile To Device prompt, select the job and click Apply.
Security Policy (Android)
Security Policy job remotely configures security policy on the enrolled device(s). There are two kinds of security policies to choose from: Password Policy and Peripheral Settings.
Password policy (Android)
Admin can remotely configure password policy on the enrolled devices.
To create a Security Policy job for password and deploy it to the enrolled device(s) remotely, follow these steps:
- Navigate to eMDM Console > Jobs > New Job > Android > Security Policy > Password Policy.
-
Select the following settings and click OK.
- Disable password policy on device
- Enforce Password Policy on Device
- Minimum Password Length
- Password Strength
- Time lapse before device auto-locks
- Maximum Failed Password Attempts Before Device Wipes
The newly created job will get listed in the Jobs List section.
- Go back to Home tab and select the Android device(s) or group(s).
- Click Apply to launch the Apply Job/Profile To Device prompt.
- In the Apply Job/Profile To Device prompt, select the job and click Apply.
Peripheral Settings (Android)
Admin can remotely configure peripheral settings on the enrolled devices.
To create a Security Policy job for Peripheral Settings and deploy it to the enrolled device(s) remotely, follow these steps:
- Navigate to eMDM Console > Jobs > New Job > Android > Security Policy > Peripheral Settings.
-
Select the required settings from the following and click OK.
- Enforce Peripheral Settings on Device
- Disable Bluetooth
- Disable WiFi
- Disable Camera
- Mobile Data
- GPS
The newly created job will be listed in the Jobs List section.
- Go back to Home tab and select the Android device(s) or group(s).
- Click Apply to launch the Apply Job/Profile To Device prompt.
- In the Apply Job/Profile To Device prompt, select the job and click Apply.
Application Settings (Android)
Application Settings job helps the user to manage the applications remotely based on selecting a Job Type from the following:
- Lock Apps - Lock the application with password
- Run at startup - Run the application on device booting
- Uninstall applications - Remove the application from the device
- Clear data - Delete the data of an application
- Show Apps - Displays the applications on the device
- Hide Apps – Hides the applications on the device
Note: Show Apps and Hide Apps features will work only on Android Enterprise devices.
To create Application Settings job and deploy it to the enrolled device(s) or group(s) remotely, follow these steps:
- Navigate to eMDM Console > Jobs > New Job > Android > Application Settings.
-
In the Application Settings prompt, enter the following details and click OK.
- a. Enter a Job Name.
- b. Select the Application Name(s) from the list.
- c. Click Add to move Application Names in the right-side box.
- d. Click Remove to remove the Application Names from the right- side box.
- e. Select the desired Job Type.
- f. Click Advanced to set the Password in Advanced Settings prompt.
The newly created job will be listed in the Jobs List section.
- Go back to Home tab and select Android device(s) or group(s).
- Click Apply to launch the Apply Job/Profile To Device prompt.
- In the Apply Job/Profile To Device prompt, select the job and click Apply.
Wi-Fi/Hotspot Settings (Android)
Admins can remotely configure Wi-Fi/Hotspot settings on the enrolled device(s).
To create Wi-Fi/Hotspot Settings job and deploy it to the enrolled device(s) or group(s) remotely, follow these steps:
- Navigate to eMDM Console > Jobs > New Job > Android > Wi-Fi/Hotspot Settings > WiFi Configuration Settings > Add.
-
Configure Wi-Fi/Hotspot settings and click OK.
Settings
Description
SSID
Enter the SSID name.
Password
Enter the password to connect to the network.
Security Type
Select the security type (Open / WEP / WPA/WPA2 PSK).
Auto Connect
Select this option to automatically connect to the network.
Create Hotspot
Select this option to connect the device to the Hotspot.
Hidden Network
Select this option to connect to a network that is not open or broadcasting.
-
Click OK.
The newly created job will be listed in the Jobs List section.
- Go back to Home tab and select Android device(s) or group(s).
- Click Apply to launch the Apply Job/Profile To Device prompt.
- In the Apply Job/Profile To Device prompt, select the job and click Apply.
Email Configuration Settings (Android)
Admin can remotely configure an email account or delete a configured email account on the enrolled devices using Email Configuration Settings job.
Create an Email Account (Android)
Note: This feature is currently available for Samsung KNOX devices only.
To create a job to configure an email account on the enrolled device(s) or group(s) remotely, follow these steps:
- Navigate to eMDM Console > Jobs > New Job > Android > Email Configuration Settings > Create E-mail Account.
-
Configure E-mail Account settings and click OK.
Settings
Description
Job Name
Enter a Job name.
User Name /Password
Enter the user name and password for the email account.
Server Type
Enter the Server Type (IMAP/POP3/MS EXCHANGE).
Incoming Server Address /Outgoing Server Address
Enter the email server address for incoming and outgoing mails
Security Type
Select an option from the below:
- SSL
- SSL(Accept Certificates)
- TLS
- TLS (Accept Certificates)
Incoming Port /Outgoing Port
Enter the number of the port assigned for incoming/outgoing email traffic.
Signature
Enter the email signature to be displayed for all outgoing emails.
The newly created job will be listed in the Jobs List section.
- Go back to Home tab and select the Android device(s) or group(s).
- Click Apply to launch the Apply Job/Profile To Device prompt.
- In the Apply Job/Profile To Device prompt, select the job and click Apply.
Delete an Email Account (Android)
Note: This feature is currently available for Samsung KNOX devices only.
To create a job to delete an email account on the enrolled device(s) or group(s) remotely, follow these steps:
- Navigate to eMDM Console > Jobs > New Job > Android > Email Configuration Settings > Delete E-mail Account.
-
In the Email Configuration Settings prompt, enter the following details and click OK.
Setting
Description
Job Name
Enter the Job name.
User Name
Enter the user name for the email account
Server Type
Select the server type (IMAP/POP3/MS EXCHANGE)
Incoming Server Address
Enter the email server address for incoming mails
The newly created job will be listed in the Jobs List section.
- Go back to Home tab and select the Android device(s) or group(s).
- Click Apply to launch the Apply Job/Profile To Device prompt.
- In the Apply Job/Profile To Device prompt, select the job and click Apply.
Telecom Management Policy (Android)
This job allows admin to remotely set thresholds for data usage,call logs and sms logs on the enrolled device(s) or group(s). Admin can use this job to receive automatic notifications and even block mobile data of the device if the data usage goes beyond the set threshold limit.
To create Telecom Management Policy job and deploy it to the enrolled device(s) or group(s) remotely, follow these steps:
- Navigate to eMDM Console > Jobs > New Job > Android > Telecom Management Policy.
-
In the Telecom Management Policy prompt, select the following:
Data Usage Tracking
Settings
Description
Enable Telecom Management
Allow the configuration of telecom management policy.
Configure Billing Cycle
Select the billing cycle (Monthly Weekly/Daily/Custom)
Note: Billing Start Date / Day will be auto-populated based on the option selected in the Configure Billing Cycle.
Configure Mobile Data Limits
Enter the value to set the threshold for the data usage for Limit 1 and Limit 2.
Note: Block Data, Send Device Alert, Send MDM Alert, Send Email Alert options are enabled once the value for the threshold is entered.
Action
Select the appropriate action when the data usage exceeds the set threshold specified in Limit 1 and Limit 2:
- Block Data - Will block the data usage.
Note: This feature supports on Knox and Platform signed devices.
- Send Device Alert - Notifies the device user.
- Send MDM Alert - Notifies the eMDM admins.
- Send Email Alert - Notifies the configured email address.
Call Log Tracking
- Click Call Log Tracking tab and select an option from Call Log Tracking drop-down menu.
-
Select a value from the spin box to set Tracking Periodicity (in minutes).
SMS Log Tracking
- Click SMS Log Tracking and select an option from the SMS Log Tracking drop-down menu.
- Select a value from the spin box to set Tracking Periodicity (in minutes).
-
Click OK.
The newly created job will be listed in the Jobs List section.
- Go back to Home tab and select the Android device(s) or group(s).
- Click Apply to launch the Apply Job/Profile To Device prompt.
- In the Apply Job/Profile To Device prompt, select the job and click Apply.
Call Log Tracking (Android)
Admins can remotely track call logs on the enrolled device(s).
To create Call Log Tracking job and deploy it to the enrolled device(s) remotely, follow these steps:
- Navigate to eMDM Console > Jobs > New Job > Android > Call Log Tracking.
-
Configure Call Log Tracking settings and click OK.
Settings
Description
Job Name
Enter a name for the Job.
Call Log Tracking
Turn ON to enable the call log tracking option.
Tracking Periodicity
Enter the value for call log tracking period in minutes to track all the calls (Incoming/Outgoing/Missed) of the enrolled device for the specified time.
The newly created job will be listed in the Jobs List section.
- Go back to Home tab and select the Android device(s) or group(s).
- Click Apply to launch the Apply Job/Profile To Device prompt.
- In the Apply Job/Profile To Device prompt, select the job and click Apply.
SMS Log Tracking (Android)
Admins can remotely track SMS logs on the enrolled device(s).
To create SMS Log Tracking job and deploy it to the enrolled device(s) remotely, follow these steps:
- Navigate to eMDM Console > Jobs > New Job > Android > SMS Log Tracking.
-
Configure SMS Log Tracking settings and click OK.
Settings
Description
Job Name
Enter a name for the Job.
SMS Log Tracking
Turn ON to enable the SMS log tracking option.
Tracking Periodicity
Enter the value for SMS log tracking period in minutes to track all the SMS (Incoming/Outgoing) of the enrolled device for the specified time.
The newly created job will be listed in the Jobs List section.
- Go to Home tab and select the Android device(s) or group(s).
- Click Apply to launch the Apply Job/Profile To Device prompt.
- In the Apply Job/Profile To Device prompt, select the job and click Apply.
Geo Fence (Android)
Geo Fence option creates a virtual fence around a geographical location. Admins can configure jobs to be deployed on the devices when the user enters or exits this geographical fence.
Note: Geo Fence requires GPS capability on the device.
To create a Geo Fence job and deploy it to the enrolled device(s) or group(s) remotely, follow these steps:
- Navigate to eMDM Console > Jobs > New Job > Android > Geo Fence.
- Select Enable Geo Fencing.
-
In the Geo Fence screen, Select Fence and click Draw a Circle (located on the right of the map).
- Click and drag the circle at the desired location on the map. Once the location is marked, a prompt appears with Radius, Lat and Lgn details.
-
Enter the Geofence Name and click Save.
- The newly created fence will be listed in the table.
- Select Fence Entered tab, click Add to select the job(s) that will be activated on the device when it enters the fenced area.
- In the Select Jobs to Add screen, select the jobs from the list using Ctrl key and click OK.
-
Select a user from the following options, who will receive an alert when the device enters the fenced area:
- Device - device user
- MDM - eMDM admin
- Email - Recipient of the configured email address
- Click Save.
-
Select Fence Exited tab and repeat the steps 5 to 8 to configure the settings when the device exits the fenced area.
The newly created job will be listed in the Jobs List section.
- Go back to Home tab and select the Android device(s) or group(s).
- Click Apply to launch the Apply Job/Profile To Device prompt.
- In the Apply Job/Profile To Device prompt, select the job and click Apply.
Time Fence (Android)
Time Fence option creates a periodical boundary for mobile devices to behave or function in a specified way. Admins can configure policies on the devices by assigning jobs to execute when the device enters or exits this periodical fence.
To create a Time Fence job and push it to the enrolled device(s) remotely, follow these steps:
- Navigate to eMDM Console > Jobs > New Job > Android > Time Fence.
-
In the Time Fence prompt, select Enable Time Fencing.
Note: Click Add Fence to add multiple fences.
- Enter the Start Time, End Time and select the Days.
- Select Fence Entered tab, click Add to select the job(s) that will be activated on the device when it enters the periodical fence.
- In the Select Jobs to Add screen, select the multiple jobs from the list using Ctrl key.
-
Select the user from the following options, who will receive an alert when the device enters the periodical fence:
- Device - Device user
- MDM - eMDM admin
- Email - Recipient of the configured email address
- Click Save.
-
Select Fence Exited tab and repeat the steps 4 to 7 to configure the settings when the device exits the periodical fence.
The newly created job will be listed in the Jobs List section.
- In the Job Details window, enter a Job Name.
- Go back to Home tab and select the Android device(s) or group(s).
- Click Apply to launch the Apply Job/Profile To Device prompt.
- In the Apply Job/Profile To Device prompt, select the job and click Apply.
Network Fence (Android)
Network Fence option creates a network boundary for the mobile devices to behave or function a certain specified way. Admins can configure policies on the devices by assigning jobs to be executed when the device enters or exits a certain Wi-Fi network.
To create a Network Fence job and push it to the enrolled device(s) or group(s), follow these steps:
- Navigate to eMDM Console > Jobs > New Job > Android > Network Fence.
- In the Network Fence prompt, select Enable Network Fencing.
-
Click Select Fence tab and enter the SSID.
Note: Click Add Fence to add multiple SSID’s.
- Select Fence Entered tab, click Add to select the job(s) that will be activated on the device when it enters into a specific Wi-Fi network.
- On Select Jobs to Add screen, select the jobs from the list using Ctrl key and click OK.
-
Select the Alert Type from the following options, who will receive an alert when the device enters into a specific Wi-Fi network:
- Device - Device user
- MDM - eMDM admin
- Email - Recipient of the configured email address
- Select Fence Exited tab and repeat the steps 4 to 6 to configure the settings when the device exits a specific Wi-Fi network.
- Click Save.
-
In the Job Details window, enter a Job Name.
The newly created job will be listed in the Jobs List section.
- Go back to Home tab and select the Android device(s) or group(s).
- Click Apply to launch the Apply Job/Profile To Device prompt.
- In the Apply Job/Profile To Device prompt, select the job and click Apply.
Remote Buzz (Android)
When a device is lost or misplaced, Remote Buzz job helps admin to locate the device by pushing a job which forces it to make a sound.
To create a Remote Buzz job to locate the device and deploy it to the device(s) or group(s) remotely, follow these steps:
- Navigate to eMDM Console > Jobs > New Job > Android > Remote Buzz.
-
In the Remote Buzz prompt, enter a Job Name and Buzz Duration (in secs) and then click OK.
The newly created job will be listed in the Jobs List section.
- Go back to Home tab and select the Android device(s) or group(s).
- Click Apply to launch the Apply Job/Profile To Device prompt.
- In the Apply Job/Profile To Device prompt, select the job and click Apply.
Once this job is deployed to the enrolled device, a buzzing sound will be created for the specified duration from the device.
Compliance Job (Android)
Compliance Job is used to detect threats such as rooting/ jailbreaking, SIM card changes, password in compliance and proactively trigger specified measures like blacklisting the devices or wiping data off a device. This job allows admins to set alerts and notifications on detection of such vulnerabilities.
To create a Compliance Job and remotely deploy it to the enrolled device(s) or group(s), follow these steps:
- Navigate to eMDM Console > Jobs > New Job > Android > Compliance Jobs.
- In the Compliance Job prompt, enter a Job Name and select Enable Compliance Job.
-
Select an option from the below to configure compliance rules and click Configure.
- OS Version
- Jailbroken/Rooted
- Online Device Connectivity
- SIM Change
- Password Policy
- Battery
- Blacklisted Apps
-
Configure the Compliance Rules and under Out of Compliance Actions, select the appropriate action from the following when the compliance rules are violated:
- Send Message
- Move to Blacklist
- Wipe the Device
- Lock Device (Android/iOS)
- E-mail Notification
- Apply Job
- Send SMS
- Click Add Action to add additional Out of Compliance Actions.
-
Click Save.
The newly created job will be listed in the Jobs List section.
- Go back to Home tab and select the Android device(s) or group(s).
- Click Apply to launch the Apply Job/Profile To Device prompt.
- In the Apply Job/Profile To Device prompt, select the job and click Apply.
Remote Support Management
eMDM offers remote support feature that allows IT admins to remotely connect to end-user devices or troubleshooting and maintenance.
Remote Support features available across platforms are given in the table below. The description of the features are given below.
|
Features |
Platforms |
|||||
|
Android |
Windows |
iOS |
macOS |
Linux |
Windows CE |
|
|
Remote screen View |
||||||
|
Remote Control |
-- |
|||||
|
File Explorer |
-- |
|||||
|
Clipboard |
-- |
|||||
|
Task Manager |
-- |
|||||
|
Device Status |
-- |
|||||
|
Settings |
-- |
|||||
|
Play/Pause |
-- |
|||||
|
Volume Control |
-- |
|||||
|
Search |
-- |
|||||
|
|
-- |
|||||
Description of Remote Support Feature
The description of remote support features are given in the table below:
|
Settings |
Description |
|
Remote Screen View |
Screen sharing feature to remotely view device screen in real time. |
|
Remote Control |
Remote access feature to remotely control device using touch events. |
|
File Explorer |
Access files stored on the internal storage of the end user’s device. |
|
Clipboard |
Send, read and clear text from device clipboard. |
|
Task Manager |
Monitor processes with CPU Usage, RAM Usage, applications running on the remote device. |
|
Device Status |
View the device status (online/offline). |
|
Settings |
Change the settings for Rotate screen view, increase or decrease screenshot image quality. |
|
Play/Pause |
Play/Pause screen sharing action to avoid unnecessary data consumption. |
|
Volume Control |
Remotely increase or decrease the volume levels of the device. |
|
Search |
Search for the words/phrases on the remote screen. |
|
Screenshot |
Capture and download screenshot in .webp format. |
Remote Support Compatibility
The following table describes the remote support feature’s compatibility across platforms and eMDM eDS Agent versions.
|
Platform |
Android |
Windows |
iOS |
macOS |
Linux |
Windows CE |
|
Versions |
||||||
|
OS Version |
4.1 Onwards |
7.0 Onwards |
11 Onwards |
10.12 Onwards |
All |
6.0 Onwards |
|
eDS Agent Version |
V6.30+ |
V2.47+ |
V3.12+ |
V2.0+ |
V1.02+ |
V2.47+ |
Remote Support for Windows CE/Mobile Devices
Note: This feature works only when eMDM is running in Internet Explorer (9.0 and above versions) and MozillaFirefox (26.0 and above versions).
To initiate remote access in a device using an older version of remote support, follow these steps:
- Launch Internet Explorer 9.0 and above /Mozilla Firefox 26.0 or above browsers.
- Navigate to eMDM Console> Settings (icon located at top right of the screen) > Account Settings > Miscellaneous Settings.
- Select Old Remote Support.
-
Go back to Home tab, select and right-click the Windows CE /Windows Mobile device(s) from Device List and click Remote.
Or
-
Select the Windows CE / Windows Mobile device(s) from Device List and click Remote from dynamic jobs.
-
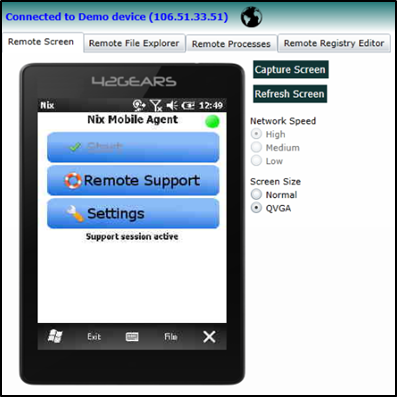
TherRemote connection will be initiated in a separate tab as shown below:
-
Remote support has the following options:
-
a. Remote Screen
Admin can perform the following actions on the Remote Screen:
- Capture or refresh the screen using a mouse or keyboard.
- Select the Network Speed (High/Medium/Low) based on the usage.
- Select Screen Size (Normal /QVGA) for better resolution.
-
b. Remote File Explorer
Remote File Explorer allows admin to access the File System of the device as well as perform basic file operations such as upload & download files, create a new folder or launch an application/file on the device remotely.
-
c. Remote Processes
Remote Processes shows all the currently running processes on the device with the functionality to kill any process remotely.
Note: Remote Processes can help admin to manage the device’s CPU usage with precision.
Note: Killing a System Critical Process may make system unstable or lead to information loss and will require a system restart to bring it back to its normal functionality.
-
d. Remote Registry Editor
eMDM provides full-fledged Remote Registry Editor allows the admin to add, edit & delete registry values and display the contents in a tree structure.
Profiles
eMDM offers a suite of policy and configuration tools for managing content and applications on enterprise devices.
Profiles can be created for the following platforms:
Android Device Profiles (General)
Following general Android profiles can be deployed to the devices without enrolling to Android Enterprise:
Configure Password Policy Profile (Android)
Password Policy allows admin to configure password settings on the enrolled devices. The settings can be configured for the device or for the applications in the container or both.
To create a password policy profile and deploy it to the device(s), follow these steps:
- Navigate to eMDM Console > Profiles > Android > Add > Password Policy > Configure.
- Enter a Profile Name.
-
In Password Policy screen, the settings available on selecting Profile
Type are given below:
Settings
Description
Device Security
Work Security
Device &Work Security
Device Minimum Password Quality
Select from the following options the devices’ minimum password quality that meets the security requirement.
- Unspecified
- Alphabetic
- Alphanumeric
- Numeric
- Complex
- Any
Device Minimum Password Length
Enter the devices’ minimum password length.
Device Maximum Failed Attempts
Number of attempts allowed before all the data on the device will be erased.
Device Maximum Password Age (In hours)
Select a value (in days). After the specified days, the password has to be changed.
Device Enforce Password History
Number of times the previously created password that cannot be selected.
Device Maximum Time to Lock (In seconds)
Period of inactivity before the devices’ screen locks automatically.
Work Profile Minimum Password Quality
Specify minimum password quality that meets the security requirement.
- Unspecified
- Alphabetic
- Alphanumeric
- Numeric
- Complex
- Any
Work Profile Minimum Password Length
Enter the minimum password length for work profile
The newly created profile will be listed in the Profiles section.
- Go back to Home tab and select the Android device(s) or group(s).
- Click Apply to launch the Apply Job/Profile To Device prompt.
- In the Apply Job/Profile To Device prompt, select the created profile and click Apply.
Configure File Sharing Profile (Android)
File Sharing Policy offers a secure way to share and distribute enterprise files on devices through File Store option. This option allows the IT
Admin to create a document library using File Store feature and share documents like images, videos and other files across enrolled devices.
To share a file using File Sharing Policy and remotely deploy it to the device(s), follow these steps:
- Navigate to eMDM Console > Profiles > Android > Add > File Sharing Policy > Configure.
- Enter a Profile Name.
- Click Add to launch File Store prompt.
-
Select the desired files or folders and click Add.
The selected files will be listed in the box located on the right side of the screen.
-
Click Done.
The selected files will be listed in the File Sharing Policy section.
-
Click Save.
The newly created profile will be listed in the Profiles section.
- Go back to Home tab and select the Android device(s) or group(s).
- Click Apply to launch the Apply Job/Profile To Device prompt.
- In the Apply Job/Profile To Device prompt, select the created profile and click Apply.
Android Enterprise Profiles
Configure System Settings Profile (Android)
System Settings allows admin to set policies to enable or disable certain system settings like USB debugging, install from unknown sources and more on the enrolled devices for the enterprise devices (BYOD/Dedicated Devices)
To create a system settings profile, follow these steps:
- Navigate to eMDM Console > Profiles > Android > Add > System Settings > Configure.
- Enter a Profile Name.
-
Select the desired System Settings for BYOD /Dedicated Devices (formerly called as COSU)/ BYOD & Dedicated devices and click Save.
To know more about the System Settings supported for BYOD/Dedicated Device/Both, see Description of System Settings.
The newly created profile will be listed in the Profiles section.
- Go back to Home tab and select the Android device(s) or group(s).
- Click Apply to launch the Apply Job/profile To Device prompt.
- In the Apply Job/Profile To Device prompt, select the created profile and click Apply.
System Settings Support
The System Settings supported for BYOD / Dedicated Device/ Both are given in the table below.
|
System Settings |
BYOD |
Dedicated Devices |
Both (BYOD & Dedicated Devices) |
|
Default Application Permission |
-- |
-- |
|
|
Unknown Sources |
-- |
-- |
|
|
USB Debugging |
-- |
-- |
|
|
System Update Policy |
-- |
-- |
|
|
Windows System Update Start Time (0-1440 minutes) |
-- |
-- |
|
|
Windows System Update End Time (0-1440 minutes) |
-- |
-- |
|
|
Enable All System Apps |
-- |
-- |
|
|
Enable Kiosk Mode |
-- |
-- |
|
|
Kiosk Exit Password |
-- |
-- |
|
|
Disable Screen Capture |
-- |
-- |
|
|
Disable Safe Mode |
-- |
-- |
|
|
Disable Factory Reset |
-- |
-- |
|
|
Disable Volume Control |
-- |
-- |
|
|
Disable App Control |
-- |
-- |
|
|
Disable Apps Uninstallation |
-- |
-- |
|
|
Disable Configuration of Bluetooth |
-- |
-- |
|
|
Disable Configuration of Credentials |
-- |
-- |
|
|
Disable Configuration of Mobile Networks |
-- |
-- |
|
|
Disable Configuration of Tethering |
-- |
-- |
|
|
Disable Configuration of VPN |
-- |
-- |
|
|
Disable Configuration of Wi-Fi |
-- |
-- |
|
|
Disable Cross Profile Copy Paste |
-- |
-- |
|
|
Disable Apps Installation |
-- |
-- |
|
|
Disable Modification of Accounts |
-- |
-- |
|
|
Disable Outgoing Call |
-- |
-- |
|
|
Disable Location Sharing |
-- |
-- |
|
|
Disable SMS |
-- |
-- |
|
|
Disable Microphone |
-- |
-- |
|
|
Disable USB File Transfer |
-- |
-- |
|
|
Disable Adding User |
-- |
-- |
|
|
Disable Removing User |
-- |
-- |
|
|
Disable Data Roaming |
-- |
-- |
|
|
Disable Network Reset |
-- |
-- |
|
|
Disable Outgoing Beam |
-- |
-- |
|
|
Disable Wallpaper |
-- |
-- |
Description of System Settings
The description of each system setting is given in the table below:
|
Settings |
Description |
|
Default Application Permission |
Allow or deny the application permission on the devices. Select the desired permission:
|
|
Unknown Sources |
Allow or deny Unknown Sources feature in the device. |
|
USB Debugging |
Allow or restrict the USB Debugging feature from Developer Options in the device. |
|
System Update Policy |
Admin can control the system updates by selecting an option from the below:
|
|
Windows System Update Start Time (0-1440 minutes) |
System update will start at the specified time. Note: This option is enabled only when Windowed System Update Policy is selected. |
|
Windows System Update End Time (0-1440 minutes) |
System update will end at the specified time. Note: This option is enabled only when Windowed System Update Policy is selected. |
|
Enable All System Apps |
Allows to access all System Apps on the devices. |
|
Enable Kiosk Mode |
Allows to lock the devices with only one or a few specific applications. |
|
Kiosk Exit Password |
Allows to use eDS Agent application in kiosk mode. |
|
Disable Screen Capture |
Restricts the user from capturing the devices’ screen |
|
Disable Safe Mode |
Restricts the user from rebooting the device into safe boot mode. |
|
Disable Factory Reset |
Restricts the user from factory resetting the device from devices’ Settings option. Admin can configure an account for Factory Reset Protection. |
|
Disable Volume Control |
Restricts the user from adjusting the volume control. |
|
Disable App Control |
Restricts the user from modifying the applications from devices’ Settings option. |
|
Disable Apps Uninstallation |
Restricts the user from uninstalling applications. |
|
Disable Configuration of Bluetooth |
Restricts the user from configuring the Bluetooth. |
|
Disable Configuration of Credentials |
Restricts the user from configuring the credentials. |
|
Disable Configuration of Mobile Networks |
Restricts the user from configuring the mobile networks. |
|
Disable Configuration of Tethering |
Restricts the user from configuring tethering and portable Hotspot. |
|
Disable Configuration of VPN |
Restricts the user from configuring VPN. |
|
Disable Configuration of Wi-Fi |
Restricts the user from configuring the Wi-Fi. |
|
Disable Cross Profile Copy Paste |
Restricts the user from copying from profile clipboard and pasting in the related profiles. |
|
Disable Apps Installation |
Restricts the user from installing the applications. |
|
Disable Modification of Accounts |
Restricts the user from adding or removing the accounts. |
|
Disable Outgoing Call |
Restricts the user from making phone calls from the device. |
|
Disable Location Sharing |
Restricts the user from turning on the location sharing. |
|
Disable SMS |
Restricts the user from sending / receiving SMS. |
|
Disable Microphone |
Restricts the user from adjusting the microphone volume. |
|
Disable USB File Transfer |
Restricts the user from transferring the files using USB. |
|
Disable Adding User |
Restricts the user from adding new users. |
|
Disable Removing User |
Restricts the user from removing the users. |
|
Disable Data Roaming |
Restricts the user from using Mobile data on roaming. Note: This feature is supported from Android version 7.0 onwards. |
|
Disable Network Reset |
Restricts the user from resetting the network options from devices’ Settings. Note: This feature is supported from Android version 6.0 onwards. |
|
Disable Outgoing Beam |
Restricts the user from using NFC to beam out data from applications. |
|
Disable Wallpaper |
Restricts the user from setting wallpaper. Note: This feature is supported from Android version 7.0 onwards. |
Configure Application Policy Profile (Android)
Application Policy profile allows admin to configure policies for App Store, Play For Work and System Applications on the enrolled devices.
To create an Application Policy profile and deploy it to the device(s), follow these steps:
- Navigate to eMDM Console > Profiles > Android > Add > Application Policy > Configure.
- Enter a Profile Name and click Add.
-
In the Select Application Source prompt, select an option from the following and click Add > Save.
eMDM App Store
In Enterprise App Store prompt, enter or select the following:
Settings
Description
App Name
Select the application name from the drop-down menu.
App Version
Version of the application.
Install Silently
Select this option to install the application without human intervention.
Play For Work
In Play Store Application Policy prompt, enter or select the following:
Settings
Description
App Name
Choose an application name from the drop-down menu.
App ID
Application ID will be auto-populated when application name is selected.
Pinning App
Select this option to lockdown the device with single or specified application.
Install Silently
Select this option to install the application without human intervention.
Allow in Kiosk Mode
Select this option to allow only specific apps.
Configure System Apps
In System Application Policy prompt, enter or select the following:
Settings
Description
App Name
Choose an application name from the drop-down menu.
App ID
Application ID will be auto-populated when application name is selected.
Permission
Select All to allow all the permissions.
Status
Specify the status (Default/ Grant / Deny)
Pinning App
Select this option to lockdown the device with single or specified application.
Allow in Kiosk Mode
Select this option to allow only specific apps.
The newly created profile will be listed in the Profiles section.
- Go back to Home tab and select the Android device(s) or group(s).
- Click Apply to launch the Apply Job/Profile To Device prompt.
- In the Apply Job/Profile To Device prompt, select the created profile and click Apply.
Configure Network Settings Profile (Android)
Network Settings allows admin to configure policies for network connection on the enrolled devices.
To remotely configure Network Settings profile on the enrolled device(s), follow these steps:
- Navigate to eMDM Console > Profiles > Android > Add > Network Settings > Configure.
- Enter a Profile Name.
-
In the Network Settings screen, enter the following details and click Save.
Settings
Description
Proxy Type
Select Manual or Auto proxy type to configure with the VPN.
Note: This feature is supported on Android Enterprise Dedicated devices.
If selected:
- Manual - Enter the Proxy Server name where all the devices are connected and Port number of the proxy server.
- Auto - Enter the Proxy PAC URL.
Package Name
Enter a Package Name.
Disable network access when VPN is not connected
Select this option to disable the network connection when VPN is not connected.
The newly created profile will be listed in the Profiles section.
- Go back to Home tab and select the device(s).
- Click Apply to launch the Apply Job/Profile To Device prompt.
- In the Apply Job/Profile To Device prompt, select the created profile and click Apply.
Configure Certificate Profile (Android)
Certificate in Profiles section allows admin to remotely upload corporate certificates and other certificates that are necessary to authenticate the device access to the network.
To create a Certificate profile and deploy it to the device(s), follow these steps:
- Navigate to eMDM Console > Profiles > Android > Add > Certificate > Configure.
-
In the Certificate prompt,
-
To fetch the existing SCEP certificate from CA server, follow these steps:
a. Deselect Create Certificate Using SCEP.
b. Select Certificate Usage (VPN and Apps / Wi-Fi) from the drop-down list.
c. Upload Certificate file from saved location.
d. Enter Password and click Add.
-
To get SCEP certificate from another CA server, follow these steps: a. Select Create Certificate Using SCEP.
b. Select Certificate Usage (VPN and Apps / Wi-Fi) from the drop-down list.
c. Select Override Account-Wide SCEP Settings.
This will enable admin to create and configure another certificate using SCEP. To configure SCEP in eMDM, see the steps under Configure SCEP.
d. Click Add.
The newly created profile will be listed in the Profiles section.
-
-
Enter the Profile Name and click Save.
The newly created profile will be listed in the Profiles section.
- Go back to Home tab and select the Android device(s) or group(s).
- Click Apply to launch the Apply Job/Profile To Device prompt.
- In the Apply Job/Profile To Device prompt, select the created profile and click Apply.
Configure Mail Configuration Profile (Android)
Mail Configuration allows admin to configure or sync the email account settings on the enrolled devices.
Using Gmail App
Note:
i. Currently this feature support settings configuration for ActiveSync type.
ii. Google Play Store should be present in the container. To allow Google Play Store inside the container, follow these steps:
- Navigate to eMDM Console > Profiles > Android > Add > Application Policy > Configure > Add > Configure System Apps.
- In App Name drop down, select Google Play Store and click Add.
- Save the Profile by giving Profile Name and deploy it to the device.
Note: Apps list must be synced with eMDM Console under Dynamic Jobs for adding Google Play Store from Configure System Apps.
To create a Mail Configuration profile using Gmail App and deploy it to the devices, follow these steps:
- Navigate to eMDM Console > Profiles > Android > Add > Mail Configuration > Using Gmail App.
- Enter a Profile Name.
-
Configure the Mail Configuration settings and click Save.
Settings
Description
Email Address
Enter the email address.
Host Name
Enter the name of the email server.
User Name
Enter the username for the email account.
Device Identifier
Enter the device identifier.
SSL Required
Select Yes or No to allow or deny all communications through the Secure Socket Layer.
Trust all Certificates
Select Yes or No.
Login Certificate Alias
Enter the Certificate Alias value.
Default Email Signature
Enter the email signature to be displayed on outgoing emails.
Default Sync Window
Select the period of time (in minutes). This will automatically sync in the specified time.
Note: When Mail Configuration profile is deployed on multiple devices to configure multiple email accounts, wild card characters can be used to refer email addresses as “$emailaddress$” and usernames as “$emailaddress$”. For the Wild card option to work, the device should be enrolled with OAuth (G Suite/ ADFS/ Azure AD).
The newly created profile will be listed in the Profiles section.
- Go back to Home tab and select the Android device(s) or group(s).
- Click Apply to launch the Apply Job/Profile To Device prompt.
- In the Apply Job/Profile To Device prompt, select the created profile and click Apply.
Note:
i. Using Gmail App works only for enterprise devices (BYOD /COSU).
ii. For Mail Configuration to work, Gmail should be approved from Google Play for Work. See the below link to know how to approve applications from Google Play for Work.
Configure Wi-Fi Configuration Profile (Android)
Wi-Fi Configuration allows admin to configure Wi-Fi settings on the enrolled devices.
To configure Wi-Fi remotely on the enrolled device(s), follow these steps:
- Navigate to eMDM Console > Profiles > Android > Add > Wi-Fi Configuration > Configure.
- Enter a Profile Name.
-
Configure WiFi Configuration settings and click Save.
Settings
Description
SSID
Enter the SSID name of the desired network.
Password
Enter the password to configure WiFi settings.
Security Type
Select the security type (Open / WEP / WPA/WPA2 PSK) for the network type.
Auto Connect
Select this option to automatically connect to the network.
Hidden Network
Select this option to connect to a network that is not open or broadcasting.
The newly created profile will be listed in the Profiles section.
- Go back to Home tab and select the Android device(s) or group(s).
- Click Apply to launch the Apply Job/Profile To Device prompt.
- In the Apply Job/Profile To Device prompt, select the created profile and click Apply.
Configure Mobile Threat Detection Profile (Android)
The Mobile Threat Detection feature in eMDM Console scans applications downloaded on devices to detect potential threats as primary device protection.
Note: Currently, this feature is only available for ecom Enterprise subscription model users and is supported only on Android devices.
There are two ways to deploy Mobile Threat Detection profile:
- Remote Deployment of Mobile Threat Detection profile in multiple devices
- Remote Deployment of Mobile Threat Detection profile in a single device
Remote Deployment of Mobile Threat Detection (MTD) profile in Multiple Devices
This method allows admin to enable MTD feature in multiple devices at the same time and generate MTD App Scan Report.
To configure Mobile Threat Detection profile remotely on the enrolled device(s), follow these steps:
- Navigate to eMDM Console > Profiles > Android > Add > Mobile Threat Detection > Configure.
- Enter a Profile Name.
-
Configure Mobile Threat Detection settings and click Save.
Settings
Description
Enable MTD App Scan
Select this option to configure MTD App scan.
Days & Time
Specify the Days and Time for the frequency of scan.
- Go back to Home tab and select the Android device(s) or group(s).
- Click Apply to launch the Apply Job/Profile To Device prompt.
- In the Apply Job/Profile To Device prompt, select the created profile and click Apply.
Once Mobile Threat Detection profile is deployed to the device(s), the device(s) will start a periodic scan as per profile configuration. After scanning is complete, admin can view the devices’ health in the device grid showing the count of threats detected on scanning.
Note: Following columns in the Device Grid indicates the overall health of devices:
- Encryption Status
- CTS Verified
- Platform Integrity
- Threat Protection
- USB Debugging
- Unknown Source Apps
Admin can generate and view MTD scan report. See Create On Demand Report.
Remote Deployment of Mobile Threat Detection profile in single device
Admin can also scan the device instantly and generate On Demand report for a single device through System Scan job in dynamic jobs.
To scan a device using Dynamic Jobs, follow the below step:
- In the eMDM Home, select a device and click More located at the right corner of the Console and click System Scan.
The scanning will be done instantly and the report can be generated for the scanned device by creating On Demand Report.
Note: The device must be online.
App Store
Enterprise app store helps organizations to deploy in-house business apps and public application available in common app marketplaces.
Business can use eMDM Console to compile a list of enterprise apps and push them to the enrolled mobile devices. The users can use this App Store to download desired apps from the list of corporate-approved apps. App Store can be created on Android.
App Store for Android
To create an Enterprise App Store and deploy it to an Android device(s), following steps have to be performed.
- Create an Enterprise App Store
- Create and Deploy Application Policy profile on the Android devices
Create an Enterprise App Store
To create an enterprise App Store, follow these steps:
-
Navigate to eMDM Console > App Store > Android > Add new app.
-
Select desired option from Select Options to add an application.
-
Upload APK
-
APK link
-
Web App
-
Once the app is successfully added, the application will start reflecting in the App Store screen.
Create and Deploy Application Policy Profile (Android)
To create and deploy Application Policy profile on the enrolled devices, see Configure Application Policy Profile (Android).
Once the profile is successfully deployed, the device(s) will have a new app with a list of approved apps that the users can browse and install.
File Store
File Store offers a secure way to share and distribute enterprise files on Android, iOS and Windows devices. This option allows the admins to create a document library and share documents like images, videos and other files across enrolled Android/Windows/iOS/macOS devices.
Manage Files/Folders
File Store option helps the admin to manage the files or folders in eMDM Console. Following actions can be performed in File Store section:
|
Settings |
Description |
|
Enable File Store for all devices |
Select this option to provide all users the access to their Home folder. |
|
Back, Forward |
Use these options to navigate between the folders. |
|
New Folder |
Create a new folder and upload the files in it. |
|
Upload Files |
Upload the files directly in File Store Home or within the folder. To upload a files to a folder, see Upload the Files to a Folder. |
|
Download |
Download the file from File Store Home. Select the file and click Download to download the file on the device. |
|
Delete |
Delete the file/folder from the File Store Home. |
|
View |
Displays the list of files or folders available in File Store Home. Admin can toggle between icon or list view. |
|
Sort |
Sort the list of files and folders based on the following:
|
Create and Deploy File Sharing Profile on devices
To share a file using File Store option in eMDM Console following three steps have to be performed:
Upload the file(s) to a Folder
To upload a file to File Store, follow these steps:
- Navigate to eMDM Console > File Store.
- In the File Store screen, click New Folder to create a new folder.
- Once the folder is created, double-click the folder and open.
- Click Upload files to browse and upload the desired file(s).
On successful upload, the file will be saved in the folder.
Create a File Sharing Policy Profile
To create a File Sharing Policy profile, follow these steps:
- Navigate to eMDM Console > Profiles.
- In Profiles screen, click Android/Windows/iOS/macOS > Add.
- In Android Work Profile /Windows Profile / iOS MDM Profile / macOS Profile, click File Sharing Policy > Configure.
- Enter a Profile Name and click Add to launch File Store prompt.
-
Select the desired files or folders and click Add.
The selected files will be added in the box located on the right side of the screen.
-
Click Done.
The selected files will be listed in the File Sharing Policy section.
- Click Save.
Deploy the File Sharing Policy Profile
To apply the created profile on the devices, follow these steps:
- Navigate to eMDM Console > Home.
- Select the device(s) or group(s).
- Click Apply to launch the Apply Job/Profile To Device prompt.
- In the Apply Job/Profile To Device prompt, select the created profile and click Apply.
Reports
Reports in eMDM helps the admin to manage the device and data inventory efficiently. Reports section helps the admins to generate different types of reports such as On Demand Reports, Schedule Reports and Custom Reports.
Create On Demand Report
On Demand Reports are the reports that are generated with the predefined template. Some of the reports that can be generated using predefined format are System Log, Asset Tracking, Call Log Tracking, Jobs Deployed, Installed Job Report, Device Health Report, Device History, Data Usage, Device Connected, App Version.
To generate an On Demand Report, follow these steps:
- Navigate to eMDM Console > Reports > On Demand Reports.
-
Select the type of report to generate from the following options:
Report Type
Description
System Log
Report will list all the activities of enrolled devices for the specified time period
Asset Tracking
Report will list all the enrolled devices’ details of the account.
Jobs Deployed
Report will list all the deployed jobs of the specific group.
Installed Job Report
Report will list all the installed jobs of a specific group.
Device Health Report
Report will list devices with following parameters for the selected group for a specified period:
- Battery Percentage
- Storage Space
- Physical Memory
Device History
Report will list the specific devices’ details such as Last Connected, Device Time, Wi-Fi Signal Strength, Data Usage and more.
Data Usage
Report will list the data usage(Wi-Fi/Mobile Data) details of devices of a group for a specified period.
Note: This option supports on the device running eDS Agent 14.27 and above & Android Lollipop onwards.
Data Usage Legacy
Report will list the data usage (Wi-Fi/Mobile Data) details of devices of a group for a specified period.
Note: This option supports on the device running eDS Agent 14.26 and below.
Device Connected
Report will list the devices last connected to the account for a specified period. The following details will be available in the report:
- Device Name
- Last Connected
- Registered Date
- Devices Status
App Version
Report will list the app versions of the devices in a specific group.
Compliance Reports
Report will list the compliance status of the devices in a specific group.
-
Click Request Report.
The request will be added to the queue and the status of the report is updated in the View Reports section.
- Go to View Reports, select the report to view or download the generated report.
Create a Scheduled Report
eMDM Console allows admin to schedule specific report generation for a specified period and also auto-send the report to email addresses. This means admin will receive the Daily/Weekly report by email without logging into eMDM Console.
To schedule reports, follow these steps:
- Navigate to eMDM Console > Reports > Schedule Reports.
- Select a report type for which report needs to be generated. To know the description of Report types, see Create On Demand Report.
- Click Schedule New.
-
In the Schedule New prompt, specify following details:
- Schedule Report Cycle – Report will be scheduled for the specified period (Daily/Weekly/Monthly)
- Mail to – Report will be sent to the specified recipient’s email addresses
- Select Group /Device - Report generated for a specific group /device
- Click Schedule.
The request will be added to the queue and the status of the report is updated in the View Reports section.
Create a Custom Report
Custom Report option generates customized reports with only the required set of data. Admin can select the required tables and filters to generate tailor-made reports.
To generate and view Custom Report, follow these steps:
- Navigate to eMDM Console > Reports > Custom Reports > Add.
- Enter a Name and Description.
-
Select the desired items for the report to generate from Tables List and click Add.
The selected items will be listed under Selected Tables List.
- Apply filters to the selected columns in Add filter (optional).
- Select the Column Name and Sort Order under Add Sort option to sort the report in ascending/descending order (optional).
- Select Group By (Column Name) and Aggregate Options to merge rows of data with the same value for the column name selected in Group By field (optional).
-
Click Save.
The newly created custom report will be saved under On Demand Reports.
- Go to On Demand Reports, select the saved custom report and select the device/group for which report should be generated.
- Click Request Report.
The request will be added to the queue and the status of the report is updated in the View Reports section.
View/Download Report
All the generated reports will be added to the queue and status of the report is updated in the View Reports section. The report can either be viewed or downloaded from this section.
Data Analytics
eMDM Analytics Engine is a convergence of large amount of data collected periodically from multiple endpoints and apps managed by eMDM. The analytics framework captures and stores data from eMDM apps such as SureLock, SureFox, Enterprise App Store and allows third party enterprise apps to register their Time Series Data with eMDM.
Generate Analytics Report for Third-Party App
App analytics is a critical feature to gauge application performance and usage across devices, locations and customers. Understanding application activity has now been made easier with Analytics Report option for third-party app integration offered by eMDM. It offers app analytics and device data usage analytics at one place, negating the need for enterprises to opt for multiple app analytics tools to analyse data on their app usage.
To generate analytics report for third-party app , following two steps have to be performed:
1. On App Side
In order to integrate third party app with eMDM Analytics, values to be analysed will have to be added on a CSV file (example – batteryinfo.csv) under specific headers.
Information to be analysed from the app is to be sent to eMDM eDS Agent by sending broadcast on action “com.gears42.nix.analytics”. An example is given below:
Intent analyticsExportToNixIntent = new Intent();

analyticsExportToNixIntent.setAction(“com.gears42.nix.analytics”);

analyticsExportToNixIntent.putExtra(“path”,Environment.getExternalStorageDirectory()+”/batteryinfo.csv”);

analyticsExportToNixIntent.putExtra(“secret_key”, “219fd050”);

analyticsExportToNixIntent.putExtra(“package_name”,context.getApplicationInfo().packageName);

context.sendBroadcast(analyticsExportToNixIntent);
*path = path of CSV file
*secret key = to be derived from eMDM console
*package name = third party application package name
2. On Console Side
To derive custom reports for third-party app on eMDM analytics, follow these steps:
- Navigate to eMDM Console >Settings (icon located at top right of the screen) > User Management > Account Settings > Data Analytics.
- Select Enable Data Analytics to configure analytics settings.
- Click Add Analytics.
- Enter a name in the Analytic Name field.
-
Enter a name in the Tag Name field. Tag Name is a unique field which can be further used for Group By purpose.
Example – Device Name.
-
Click Add Fields and select the desired Field Name, Field Type and click Add.
Note: Fields should be the same as in CSV headers. Example – Device Name, Percentage, Health, Plugged Status, Availability, Charging Status, Technology, Temperature and Voltage.
- Click Save.
-
Once analytics is successfully saved, click Show to reveal the Secret Key. The Secret Key is important as this will be later added on the broadcast.
- Go to Reports and select Custom Reports /Schedule Reports to generate the report. See the steps under Create a Scheduled Report / Create a Custom Report.
User Permissions
eMDM allows customizing user permissions for all existing and new administrators using the following set of permissions:
- Roles
- Device Groups Set
- Jobs/Profiles Folder Set
- Device Grid Column Set
There are two types of users who can access the eMDM Console:
- Account Admin /Super User - There can be only one Super User for an account. This user type does not have any restrictions on the functions available in the web console.
- Admin User – Super User can create as many administrator accounts each with a unique set of permissions or roles.
Create a New User
Admin users can be created based on the following set of permissions:
- Roles
- Device Groups Set
- Jobs/Profiles Folder Set
- Device Grid Column Set
Super user have the option to use a combination of all four types of permissions. This enables the creation of admin users with tailor-made custom permissions.
To create a new user to the account with permissions, follow these steps:
- Navigate to eMDM Console > Settings (icon located at top right of the screen) > User Management.
- In the User Management screen, click Add User.
- In the Create New User screen, enter the User Name, Password, Confirm Password, First Name, Last Name, Email, Phone Number.
-
Select a role from Roles drop-down menu. To know how to configure permissions for roles see Configure Permissions for Role-based admin.
Note:
i. If no option is selected from Roles drop-down, Super User Role will be selected by default.
ii. Role can also be assigned to the existing user.
-
Select a device group from Device Group Set drop-down menu. To know how to configure permissions for Device Groups set, see Configure Permissions for Device Group Based Admin.
Note: If no option is selected from Device Group Set drop-down, Super User Device Group Set will be selected by default.
-
Select a job folder from Job Folder Set drop-down menu. To know how to configure permissions for Job Folder Set, see Configure Permissions for Job-Based Admin.
Note: If no option is selected from Job Folder Set drop-down, Super User Job Folder Set will be selected by default.
-
Select a created column set from Device Grid Column Set drop-down menu. To know how to configure permissions for Column Set Based Admin, see Configure Permissions for Column Set Based Admin.
Note: If no option is selected from Device Grid Column Set drop-down, Super User’s Device Column Set will be selected by default.
-
Select Hide Parent Group When No Access to Child Groups will hide the parent group when child groups are disabled.
For example: Super user can restrict the permission to add/delete/modify jobs for a specific admin user that will hide the Jobs module in Utility Panel. The Jobs module will not be visible to that Admin user.
In Roles prompt, disable the child modules(add/delete/modify) that will hide the Jobs module in Utility Panel.
- Click Create.
The newly created admin user will be listed in the Users section.
Configure Permissions For Roles-Based Admin
Role-Based admins will have access to the functions that are allowed by the Superuser. For example, a superuser can create a user and give him access to everything except remote wiping of enrolled devices.
The description of icons in User Management > Roles is given in the following table:
|
Buttons |
Description |
|
Add |
Add a new Role |
|
Edit |
Edit the Role details |
|
Clone |
Duplicate the existing Role |
|
Delete |
Delete the Role |
To configure permissions for role-based admin, follow these steps:
- Navigate to eMDM Console >Settings (icon located at top right of the screen) > User Management.
- In the User Management screen, select Roles tab and click Add.
- In the Roles prompt, enter a Name and Description, select the permissions to allow and click Save.
The newly created role will be listed in the User Management section.
Configure Permissions for Device Group Set Based Admin
Device Group set based admin will have access to manage only specific groups and sub-groups. When the new user logs in using the created credentials, he will be able to manage only the specified group(s) allowed by the superuser.
To configure permissions for group-based admin, follow these steps:
- Navigate to eMDM Console > Settings (icon located at top right of the screen) > User Management.
- In the User Management screen, select Device Group Set tab and click Add.
-
In the Device Groups prompt,
a. Enter the Name and Description.
b. Deselect the group(s) that has to be hidden from the user.
c. Enable Automatically Allow New Groups Added In Future to allow the Admin user to view the groups that will be added in future and click Save.
The newly created group set will be listed in the User Management section.
Configure Permissions for Job Folder Set Based Admin
This type of admin will have access to apply only specified job folders on the enrolled devices. When the new user logs in using the created credentials, the admin user will have an option to access only the job folders allowed by the superuser.
To configure permissions for job-based admin, follow these steps:
- Navigate to eMDM Console >Settings (icon located at top right of the screen) > User Management.
- In the User Management section, select Job Folder Set tab and click Add.
-
In the Job Folders prompt,
a. Enter a Name and Description.
b. Deselect the job folders that have to be hidden from the user.
c. Enable Automatically Allow New Folder Added In Future to allow the admin user to view the job folders that will be added in future and click Save.
The newly created job folder set will be listed in the User Management section.
Configure Permissions for Device Grid Column Set Based Admin
This type of admin can view only the specified column set allowed by the Super user on the device grid.
To configure permissions for Column set based admin, follow these steps:
- Navigate to eMDM Console > Settings (icon located at top right of the screen) > User Management.
- In the User Management screen, select Device Grid Column Set tab and click Add.
- In the Grid Column prompt, enter the Name and Description and select the desired columns to be allowed for the admin to view and click Save.
The newly created Device Grid column set will be listed in the User Management section.
Manage Users
Super Admin of the account will be able to manage the admin users such as add /edit/delete the users. Following are the actions that can be performed by the Super admin:
|
Actions |
Description |
|
Add User |
Add a new user. To know how to create a user, see Create a New User. |
|
Edit User |
Edit the user details. |
|
Delete |
Delete the user. |
|
Reset Password |
Reset the password of the user. |
|
Enable/Disable User |
Enable /Disable the user. |
|
Visible Column In Grid |
Select only the specific column set(s) to be visible for a Sub-user. |
|
Search |
Search for the user name in the list. |
|
Refresh |
Refreshes the user details. |
Settings
Settings section is the control panel in eMDM Console that will help the admin to manage the user interface, permission and scope. It allows admin to configure the account as per their preferences and goals. It also enables and disables the settings in compliance with organizational rules. Settings option in eMDM console helps the admin to configure branding, device enrollment rules, miscellaneous settings, single sign-On, alert templates, change password option and more.
Configure EULA Disclaimer Policy
In this section admin can define their own EULA policy for enrolling the devices for their organization.
To define the EULA disclaimer policy, follow these steps:
- Navigate to eMDM Console >Settings (icon located at top right of the screen) > User Management > Account Settings > EULA Disclaimer Policy.
- Select Use EULA Disclaimer to define the policy.
- Enter the policy in EULA Disclaimer Policy Text and click Save.
Configure Group Assignment Rules
Admin can create rules to automatically move devices to a specific group based on the device properties such as IP address, device model.
To create group assignment rules, follow these steps:
- Navigate to eMDM Console >Settings (icon located at top right of the screen) > User Management > Account Settings > Group Assignment Rules.
- Select Enable Group Assignment Rule and click Add Rules.
- Enter a Rule Name.
- Click Source Group to select a Group from the Group List and click Add.
- Select Include Subgroups to apply the rules for groups and subgroups.
-
Choose a device property from the drop-down menu and select the values appropriately:
- Local IP Address
- Global IP Address
- Device Model
Note: Admin can add multiple rules based on the device properties.
- Click Apply.
Configure Certificates
Security for the Wi-Fi / VPN Apps can be configured using SCEP (Simple Certificate Enrollment Protocol) in eMDM.
Configure SCEP
To configure SCEP in eMDM, follow these steps:
- Navigate to eMDM Console >Settings (icon located at top right of the screen) > User Management > Account Settings > Certificates.
-
Configure Certificate settings and click Save.
Settings
Description
CA Server Address
URL of the CA Server.
Certificate Template
Template that is fetched from CA server
Certificate Renewal Period
Renews the certificate automatically before the specified days/weeks/months/years.
Common Name Wild Card
Configure the wild card name as IMEI/ MAC Address/ Device Id/ Serial Number on the CA server.
Subject Alternate Name Wildcard
Configure the alternate wild card name as IMEI/ MAC Address/ Device Id/ Serial Number /Constant Text on the CA server.
Enable OTP
Sends OTP to access Wi-Fi /VPN
User Name
Enter the User Name of the account.
Password
Enter the Password of the account.
- Click Get Managed Certificates to renew or revoke the certificate manually.
Configure SAML Single Sign-On
Single Sign-On (SSO) is an authentication process that allows a user to access multiple applications with one set of login credentials.
To configure Single Sign-On on the devices,follow these steps:
- Navigate to eMDM Console >Settings (icon located at top right of the screen) > User Management > Account Settings > SAML Single Sign-On.
-
In Account Setting section, configure Single Sign-On settings:
Settings
Description
Enable Single Sign-On
Select this option to configure Single Sign-On settings.
SSO Type
Choose an option from the following:
- ADFS
- Azure AD
- Okta
- OneLogin
- PingOne
- Google G Suite
Service Identifier
Enter the Service Identifier Url.
Sign On Service Url
Enter the Url for Sign On.
Logout Service Url
Enter the Url for logout.
Note: Generally, the URL for Sign On Service Url and Logout Service Url will be the same.
Roles
Choose an option for the Roles from the drop-down menu. To know more see Configure Permissions for Role-Based Admin.
Device Group Set
Choose an option for Device Group Set from the drop-down menu. To know more, see Configure Permissions for Device Group Set Based Admin.
Jobs/Profiles Folder Set
Choose an option for Device Group Set from the drop-down menu. To know more, see Configure Permissions for Job Folder Set Based Admin.
-
Click Generate Certificate to generate a certificate automatically.
or
Click Upload Certificate to upload another certificate. These options are available when there is no certificate is uploaded.
- Click Delete Certificate or Download Certificate to delete or download the already uploaded certificate.
Configure Alert Template
Alert Template helps the admins to create a custom template alert instead of default alert messages for the following options:
- Battery Policy
- Connection Policy
- Data Usage Policy
- Notify when device comes online
- Notify when SIM is changed
- Notify when device is rooted or eDS Agent has been granted with root permission
Configure Customized Toolbar
eMDM enables the admin to create a customized job that will be added to the dynamic jobs on the Web Console.
There are two types of jobs:
- Predefined Jobs - Jobs that are available by default.
- User defined Jobs - Admins can create a customized job with the desired icon.
To create a User defined job, follow these steps:
- Navigate to eMDM Console >Settings (icon located at top right of the screen) > User Management > Account Settings > Customize Toolbar.
- In the User defined Jobs section, click Add.
-
In the Add Jobs prompt,
a. Enter a Name.
b. Click Browse Icons to browse and select an icon.
c. Select a job from the jobs list.
d. Click OK.
The newly created customized job will be displayed under User defined job section and also gets added to the dynamic jobs.
Customize eDS Agent / SureLock
Using this option admin can customize the eDS Agent and SureLock applications such as renaming the App title, importing and editing the app settings and configuring a customized icon for the app launcher.
To launch a customized eDS Agent/SureLock application, follow these steps:
- Navigate to eMDM Console >Settings (icon located at top right of the screen) > User Management > Account Settings > Customize eDS Agent/SureLock.
-
Choose an application (eMDM eDS Agent / SureLock) from Select App drop-down menu.
Note: App Download URL field is auto-populated on selecting an application from Select app field.
- Enter the desired App Title.
- In App Settings box, click Import Settings to import the app settings and click Edit Settings to edit the app settings.
- Click edit icon to upload desired image as App Launcher Icon.
- Click Generate to process the application.
- Click Download to download the application (in apk).
The apk file will be launched as a System App on the device.
Miscellaneous Settings
Miscellaneous Settings has the option to configure remote support features for enrolled devices.
The following options are available in Miscellaneous Settings:
|
Settings |
Description |
|
Use GCM |
Enable GCM (Google Cloud Messaging). |
|
Default Connectivity Option For Install/File Transfer Job |
Select the connectivity option (Wi-Fi only/ Mobile Data only /Any Network) from the drop-down menu. |
|
Provide Remote Access To ecom Support Team |
Click Grant / Revoke to grant or revive the remote access to ecom support Team. |
|
Enable Global Search |
Search devices in all the groups/subgroups present in MDM Web Console. |
|
Free up SureLock/SureFox/SureVideo licenses from device when it is deleted from eMDM (only for android |
Select this option to deactivate the SureLock / SureFox / SureVideo licenses when the device is deleted from console and tries to activate |
|
Enable Auto Search |
Search will be started once the text is typed in the Search box. |
|
Get Notified via Email |
Select this option to notify the registered email address when an enrolled device sends message to eMDM Console. |
|
Temperature Unit |
Select Celsius(°C) / Fahrenheit (°F). |
|
Fence |
|
|
Enable High Accuracy Geo-Fence |
Select this option to have better accuracy on exact location of devices and will be supported on eDS Agent version 14.69 and above. |
|
Remote Support |
|
|
Use Advanced Remote Support |
Select this option to activate remote support on Windows devices. |
|
Use Old Remote Support (Windows Mobile) |
Select this option to allow older version of remote support for Windows Mobile devices. |
|
Don't Pause Screen Capture |
Select this option to proceed with the screen capture. |
|
Zip All Downloads |
Select this option to zip the downloaded files by default. |
|
Remote Session Idle Timeout |
Choose the inactivity time in minutes. After the specified time of inactivity, remote session will be terminated and an error message will be displayed. |
Delete the Account
Super Admin will only have option to delete the account. This will be an irreversible process. Once deleted the account cannot be retrieved. All the data connected to the account will be erased.
To delete an account, follow these steps:
- Navigate to eMDM Console >Settings (icon located at top right of the screen) > User Management > Account Settings > Account Management.
- Click Delete Account.
- Enter the Captcha and click Yes.
View License Information
This section provides the license details of the eMDM account. It displays the details such as total number of license count purchased, purchase date and expiry date.
To view the license information, Navigate to eMDM Console >Settings (icon located at top right of the screen) > License Management.
Change Account Password
Admin will have the option to change the account password to access the eMDM Console.
To change the existing password of eMDM account, follow these steps:
- Navigate to eMDM Console >Settings (icon located at top right of the screen) > Change Password.
-
In Change Your Account Password prompt,
- Settings
- Description
- Old Password
- Enter the existing password.
- New Password
- Enter a desired password.
- Retype New Password
- Repeat the entry of desired password.
- Settings
- Click OK.